Section 9.2: Configuring Dual Boot Options

1. Click on the start button
2. Click on CONTROL PANEL

The control panel appears
3. In the CONTROL PANEL, click on the PERFORMANCE AND MAINTENANCE icon

4. In PERFORMANCE AND MAINTENANCE, click SYSTEM
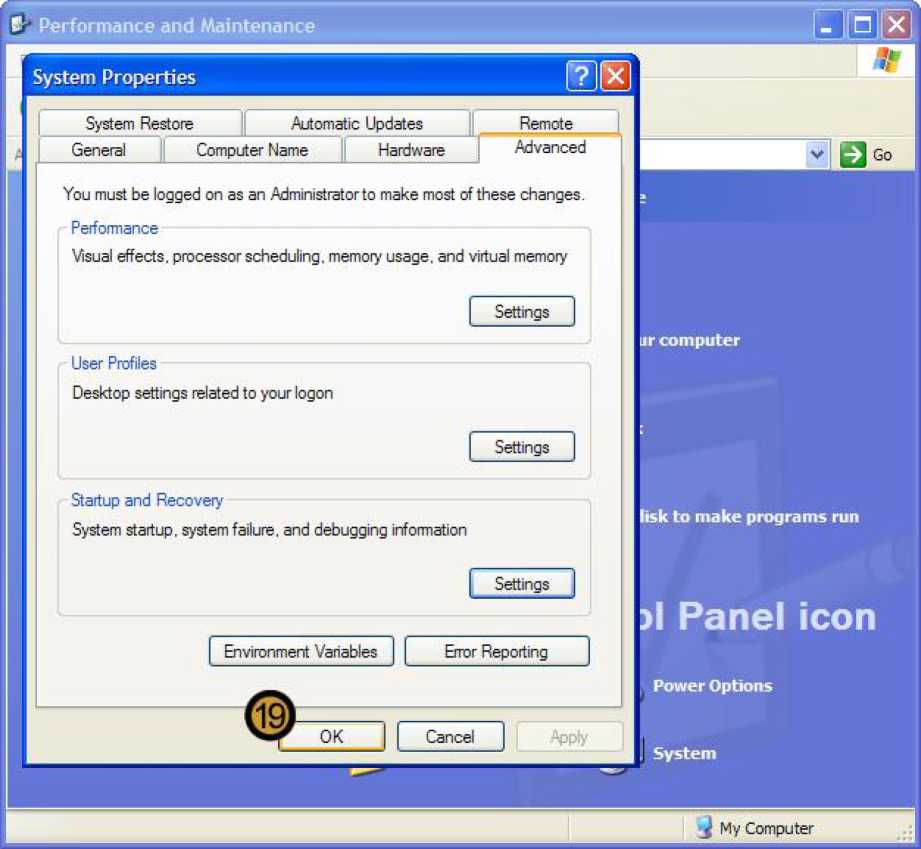
The system properties dialog box appears
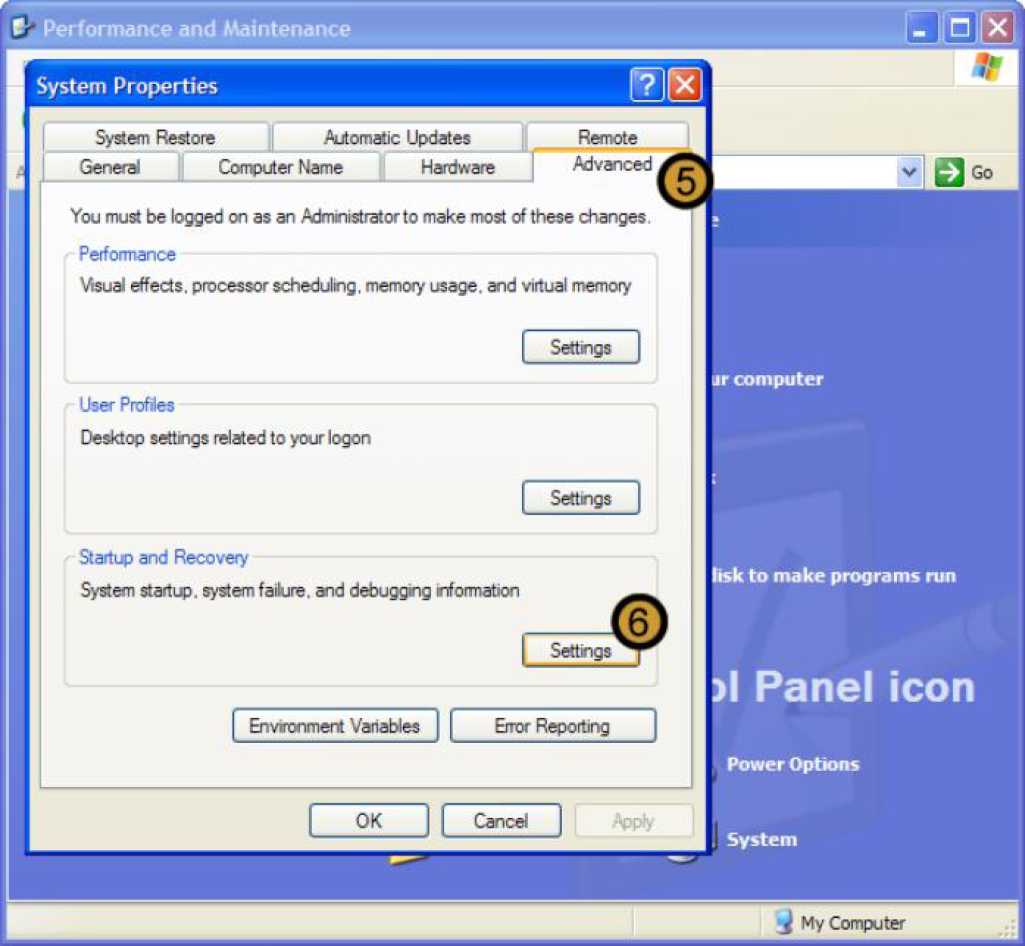
5. In system properties dialog box, click on the advanced tab
6. In the STARTUP AND RECOVERY section of the SYSTEM PROPERTIES dialog box, click SETTINGS
The startup and recovery dialog box appears
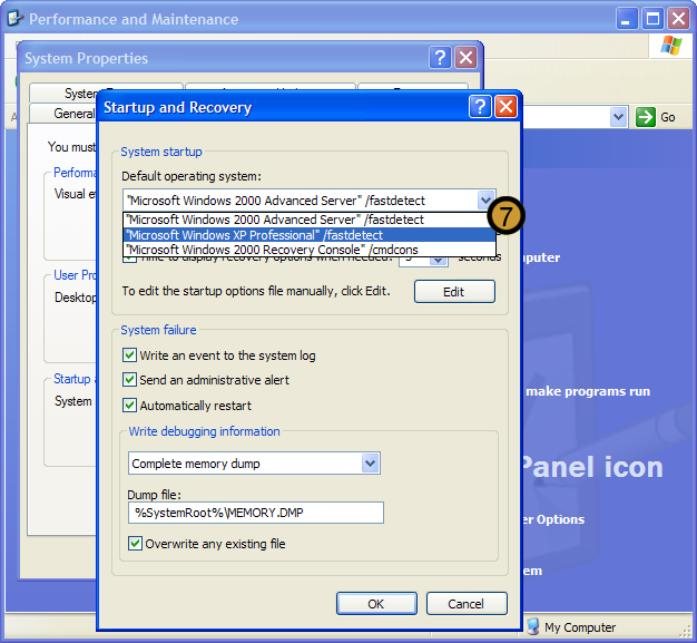
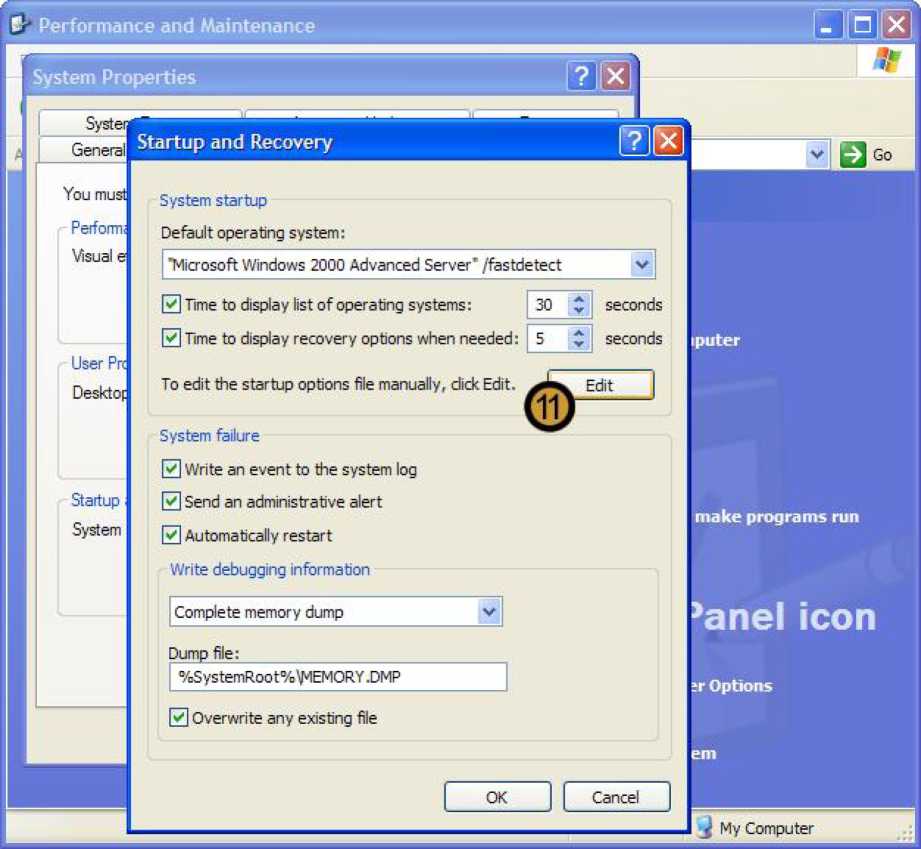
7. In the STARTUP AND RECOVERY dialog box, click DEFAULT OPERATING SYSTEM drop down list and select the operating system that you want to set as the default operating system for the local computer.
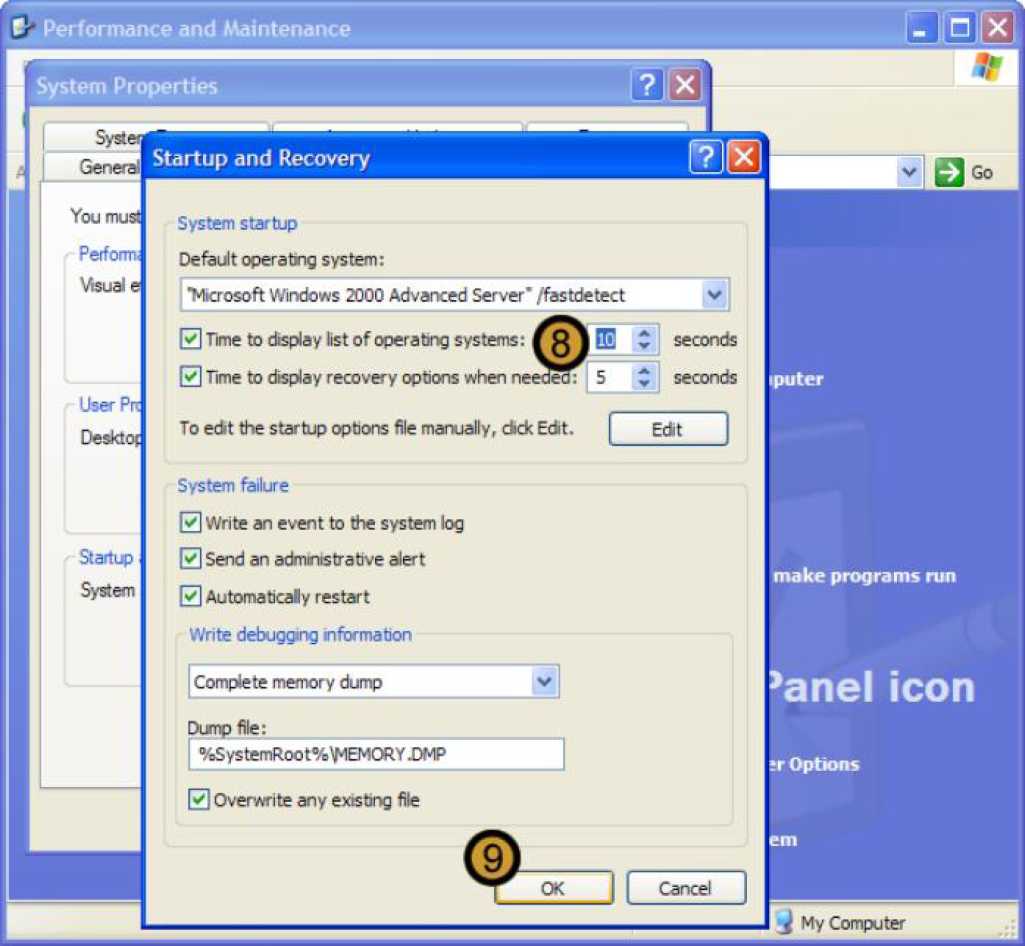
8. Set the time to display list of operating sytems option
9. Click ok
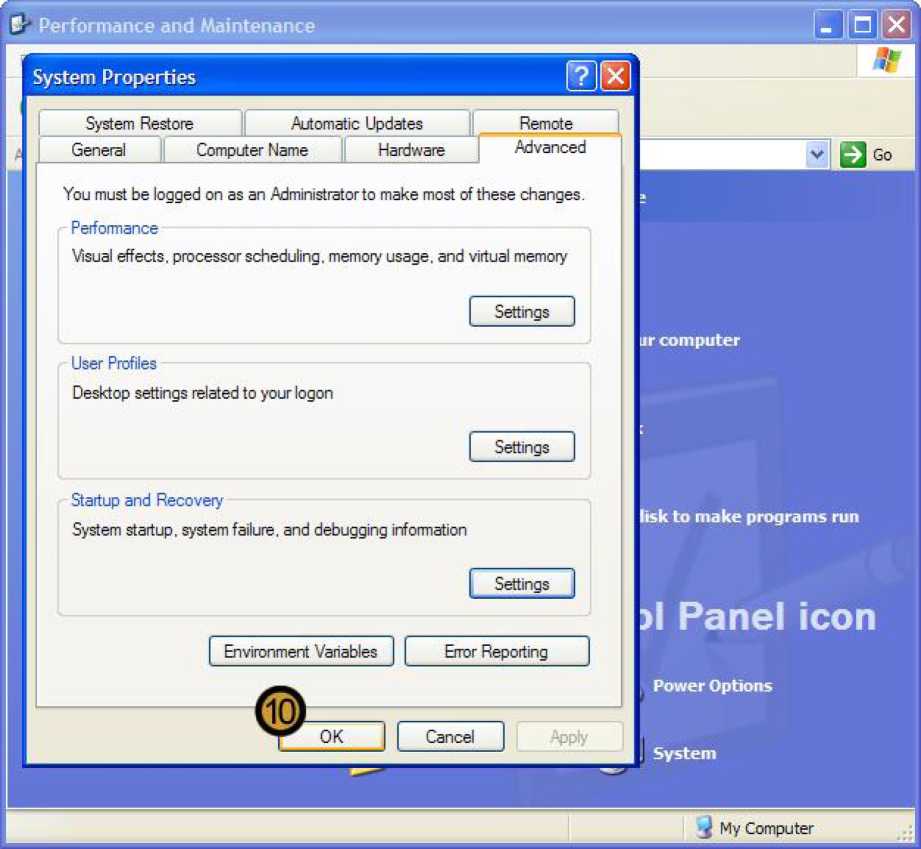
10. Close the system properties dialog box by clicking ok
Alternatively, you could alter the dual boot options by manually editing the boot.ini file. To manually alter the options:
11. On the startup and recovery dialog box, under the system startup section, click edit
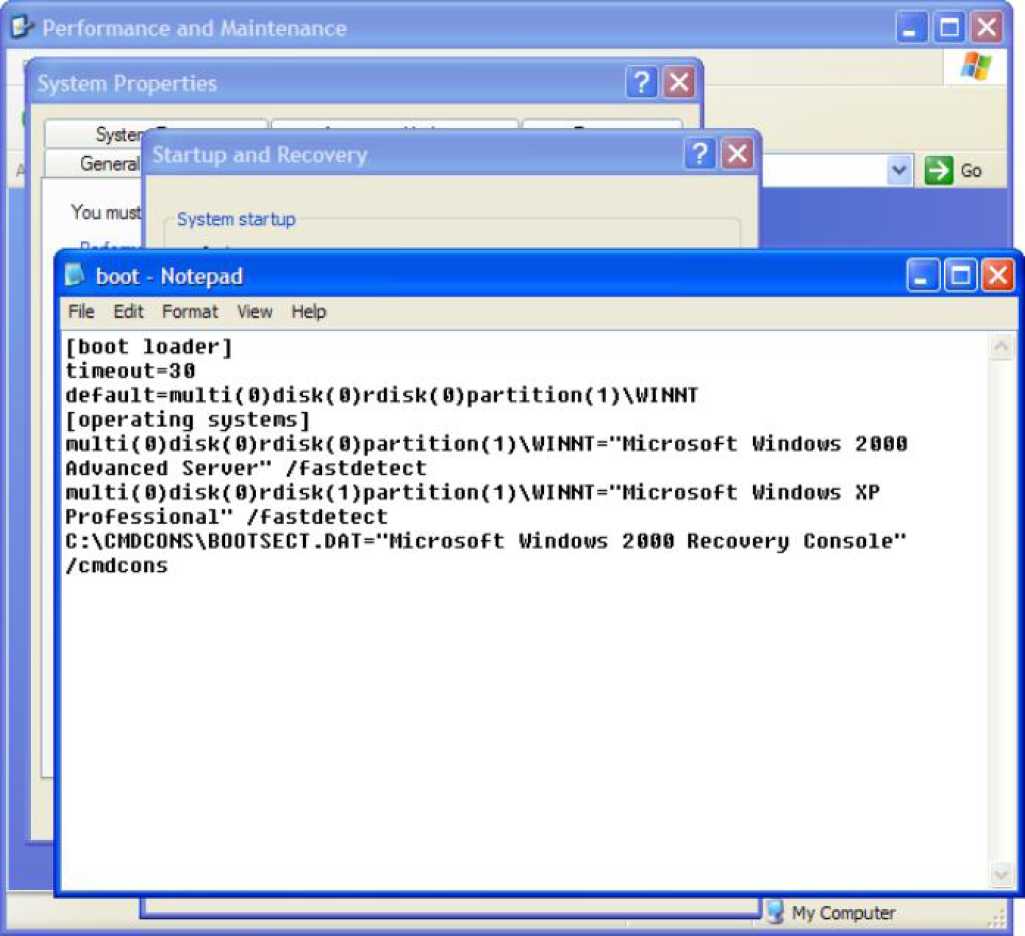
Windows XP Professional opens the boot.ini file in Notepad
Note: The current default operating system is located by the ARC Path multi(0)rdisk(0)partition(1). This is the lowest ARC Path and points the primary or system partition on the primary master hard drive.
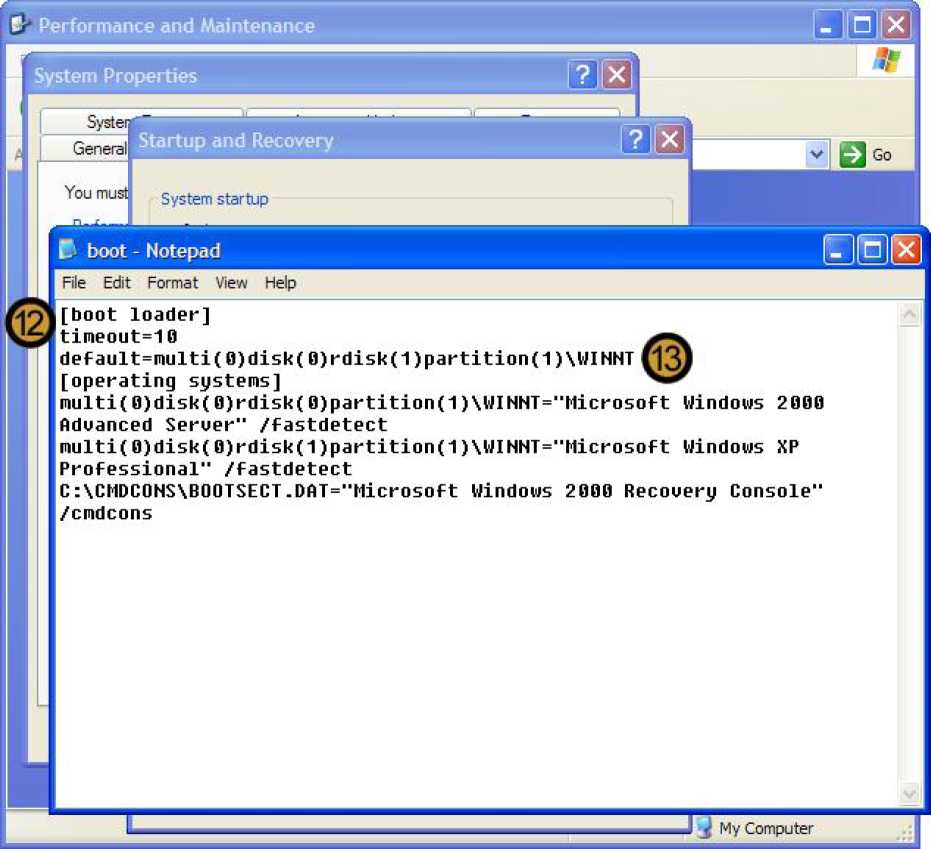
12. In the [boot loader] section, set the TIME to display list of operating sytems option
13. Set the correct ARC path to the operating system that you want to set as the default operating system on the local computer.
Note: The new ARC Path: multi(0)rdisk(1)partition(1) points to the primary partition on the primary slave hard drive which is denoted by rdisk(1).
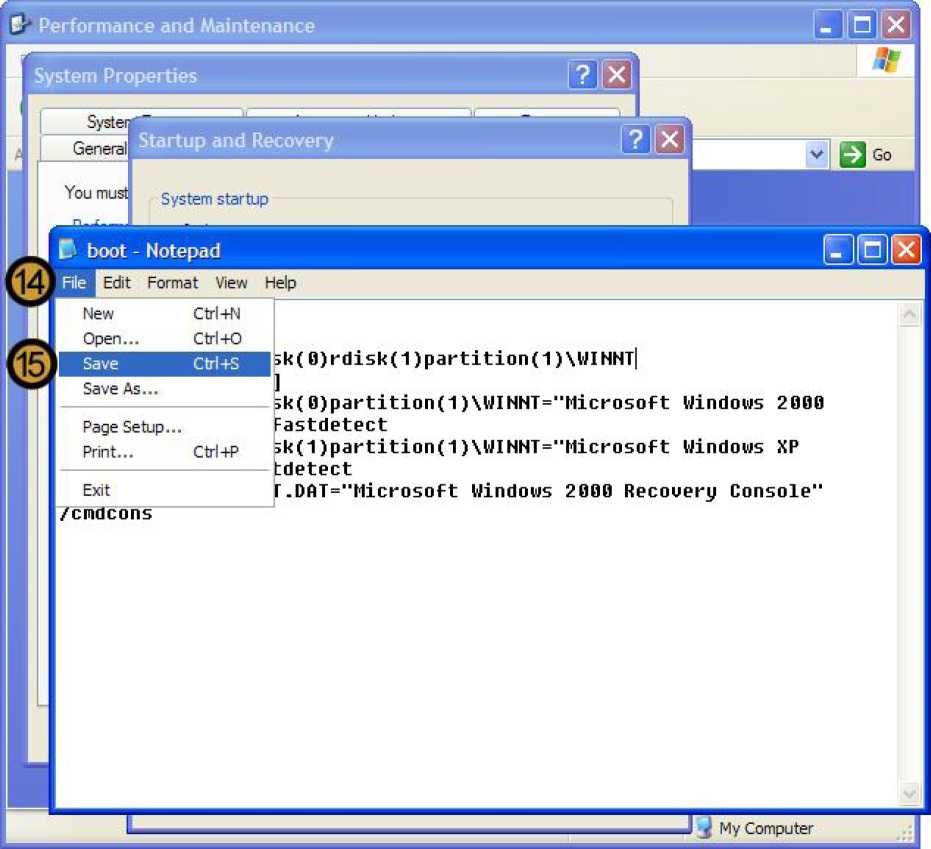
14. Click on the FILE menu
15. On the drop down menu, click SAVE
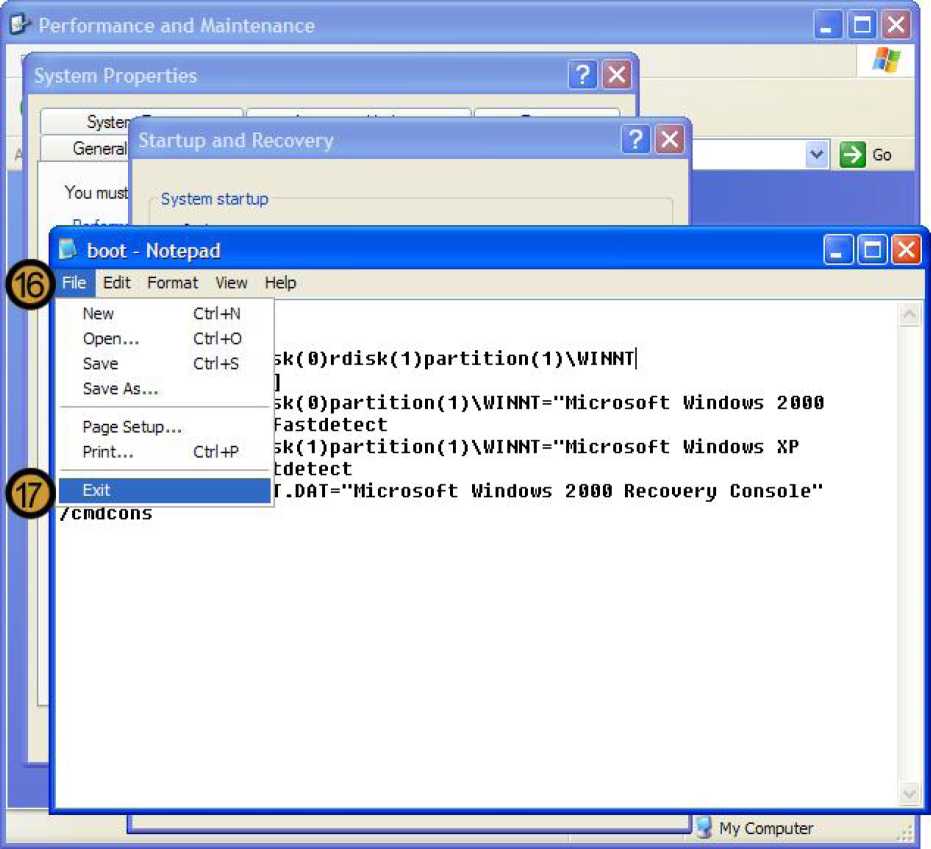
16. Click on the file menu again
17. Click EXIT
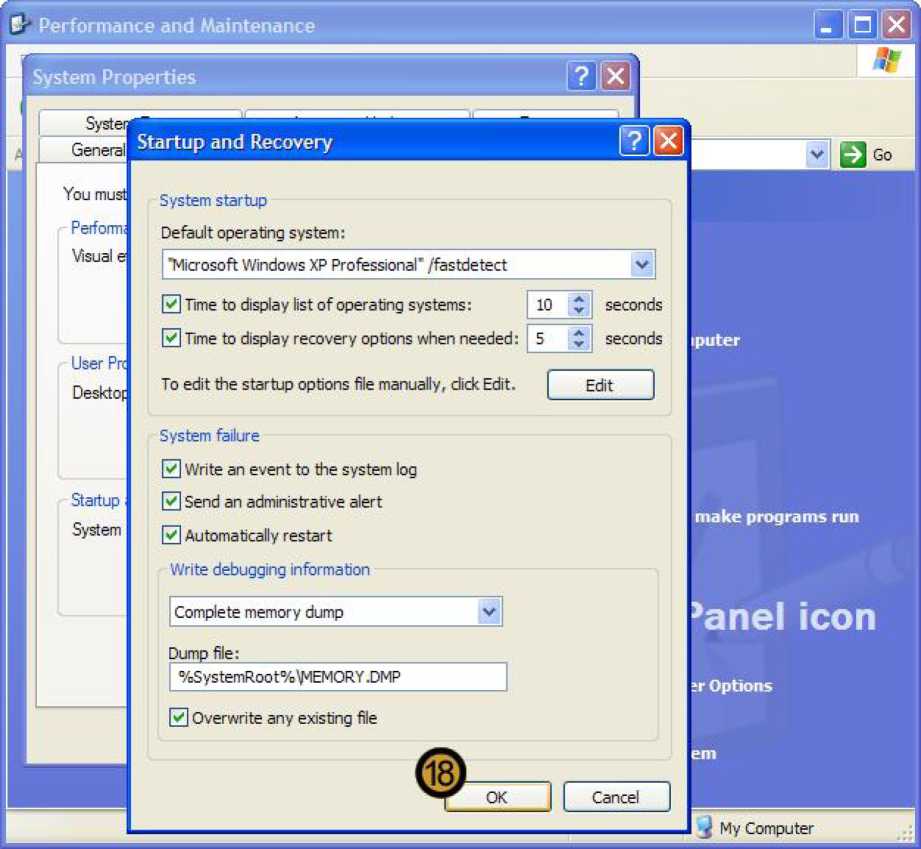
18. Close the startup and recovery dialog box by clicking ok
19. Close the startup and recovery dialog box by clicking ok
\r "DualBoot